
To be able to use Stripe payment gateway on your freelance marketplace website, you’ll need to enable this payment gateway in Admin Dashboard and get Stripe API keys.
1. Enable Stripe in WPFreelance Theme
In Admin Dashboard, go to Box Settings > Payment Gateway and enable Stripe.

2. Get API keys
- Clicking on “Setup” button on the right corner of Stripe payment gateway option, you’ll see the space to input Stripe API keys, including 4 keys: a publishable and secret key pair for test mode and live mode.

- To get these keys, first you’ll need to create a Stripe account at https://dashboard.stripe.com/register?redirect=%2Faccount%2Fapikeys
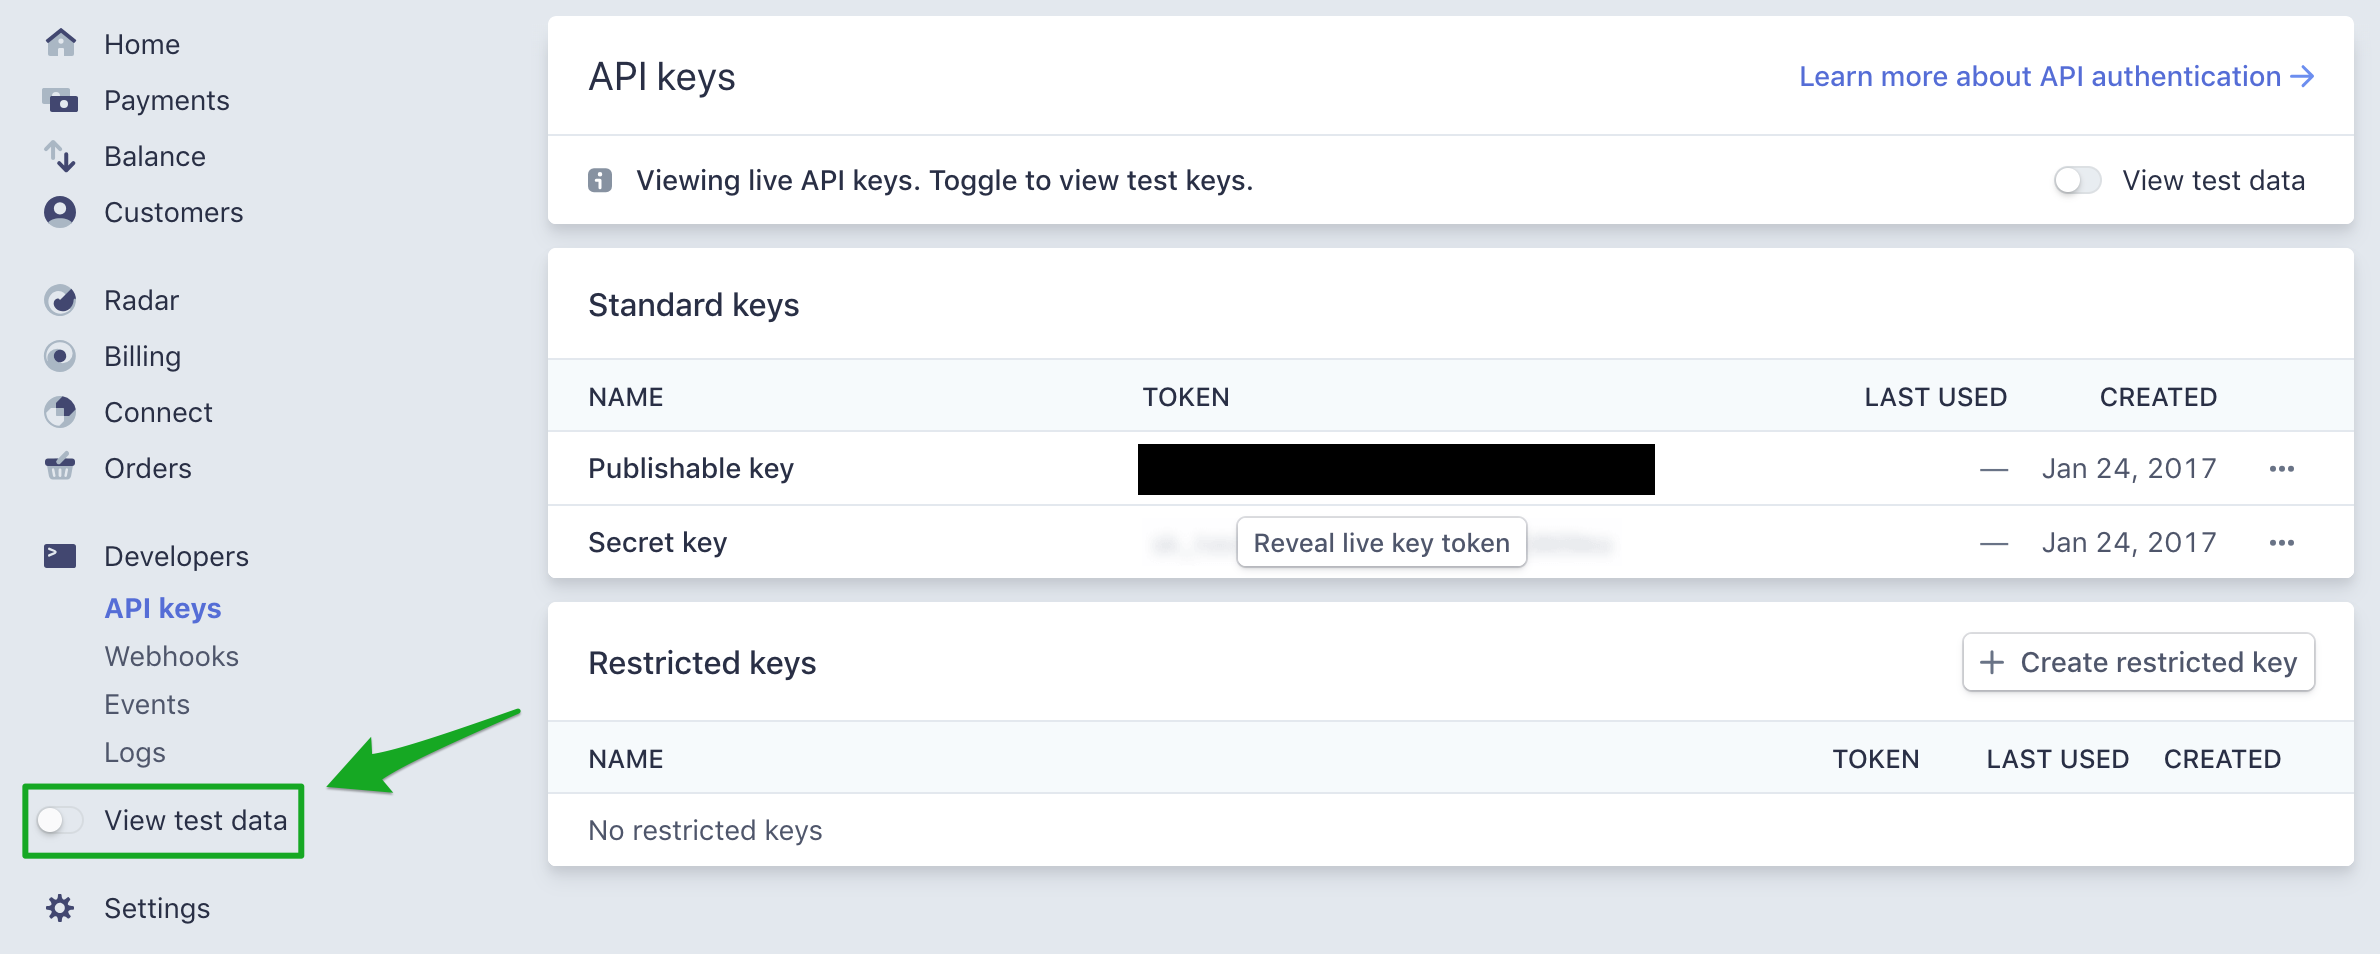
- After the signup, log in to your Stripe dashboard, from the left menu, navigate to Developer > API Keys, Publishable key and Secret key will appear. Click on “Reveal test key token” to see the secret key.
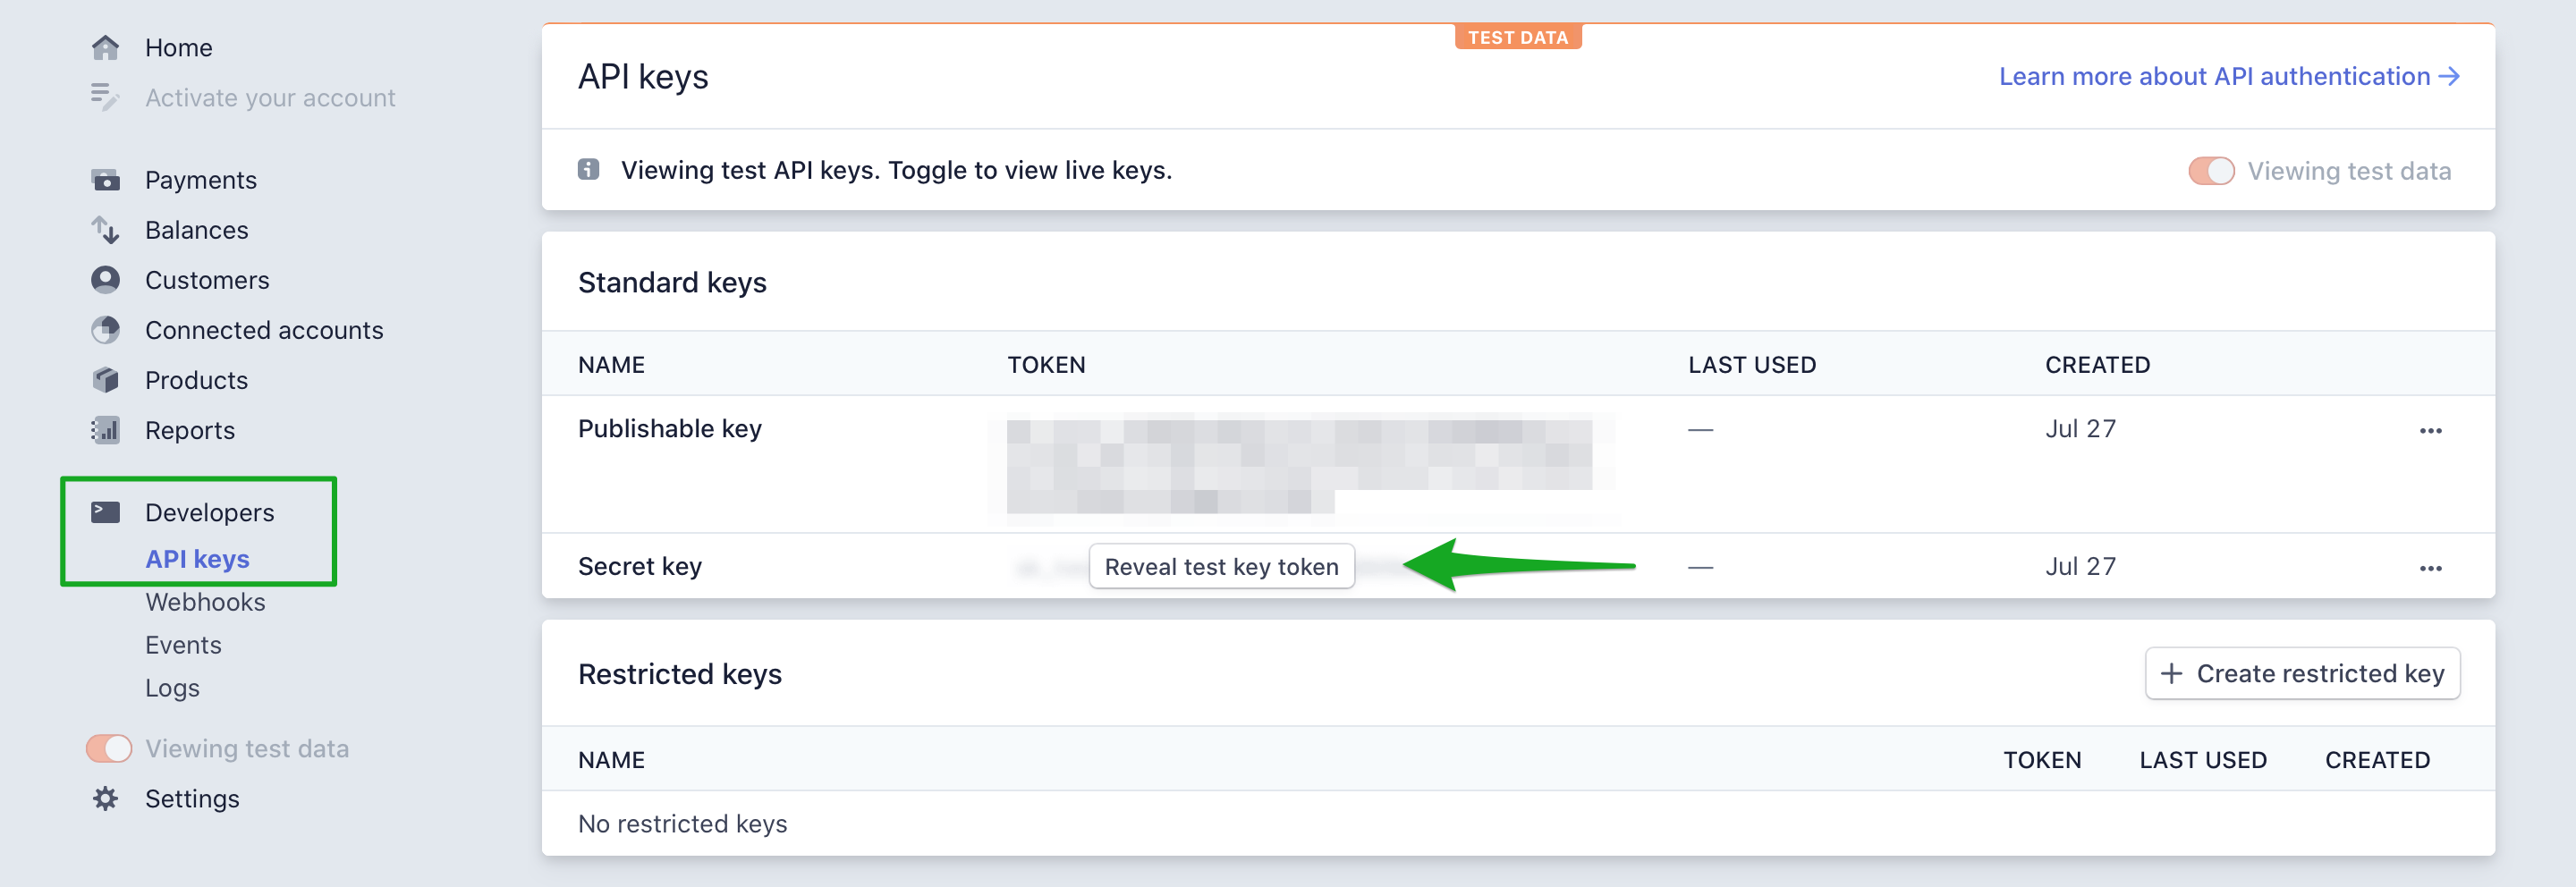
- Please note that live mode keys are different from test mode keys. To switch between these key pairs, click on “View test data” in the left menu.
- Copy these keys and paste them in appropriate fields in WPFreelance Theme Admin Dashboard.
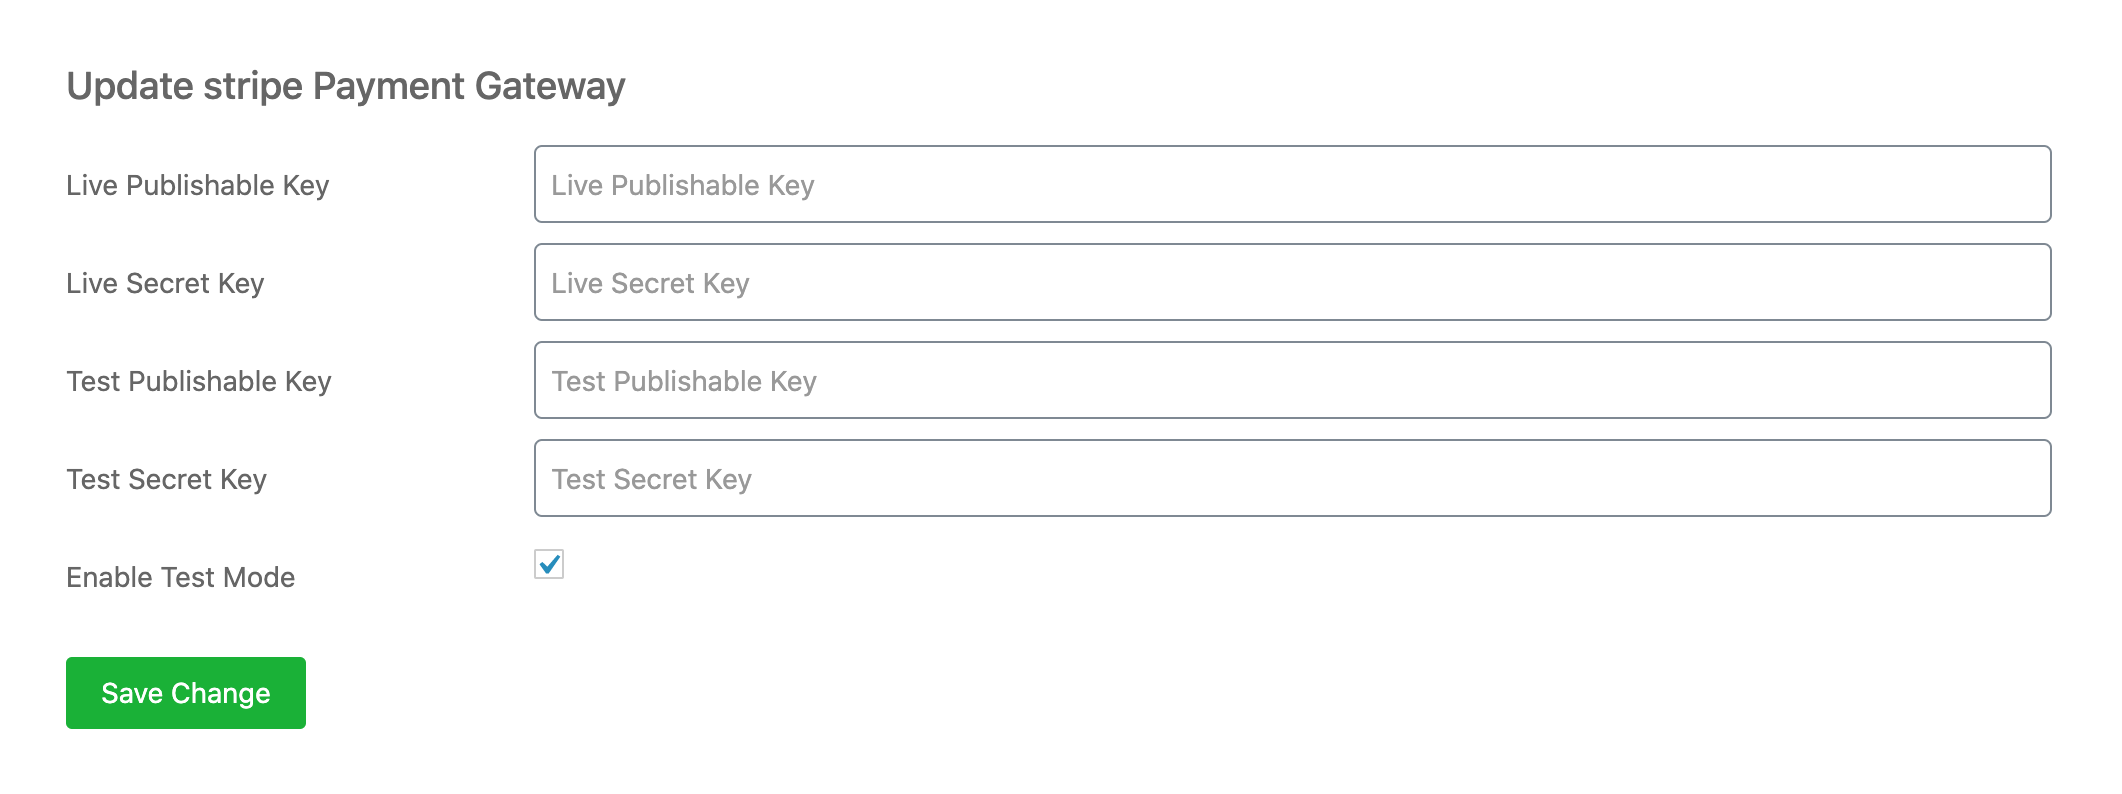
- Finally, click on Save Change button to save your settings.
* Stripe payment is now available for businesses located in 39 countries. To enable Stripe payment on your website, your business location needs to be supported by Stripe. Check out this list to see if your location is among the supported ones.
Leave A Comment?