
This guide will walk you through the process of installing WPFreelance Theme on your WordPress site. Before installing the theme, you will need to download the theme file from your member area. Let’s get started!
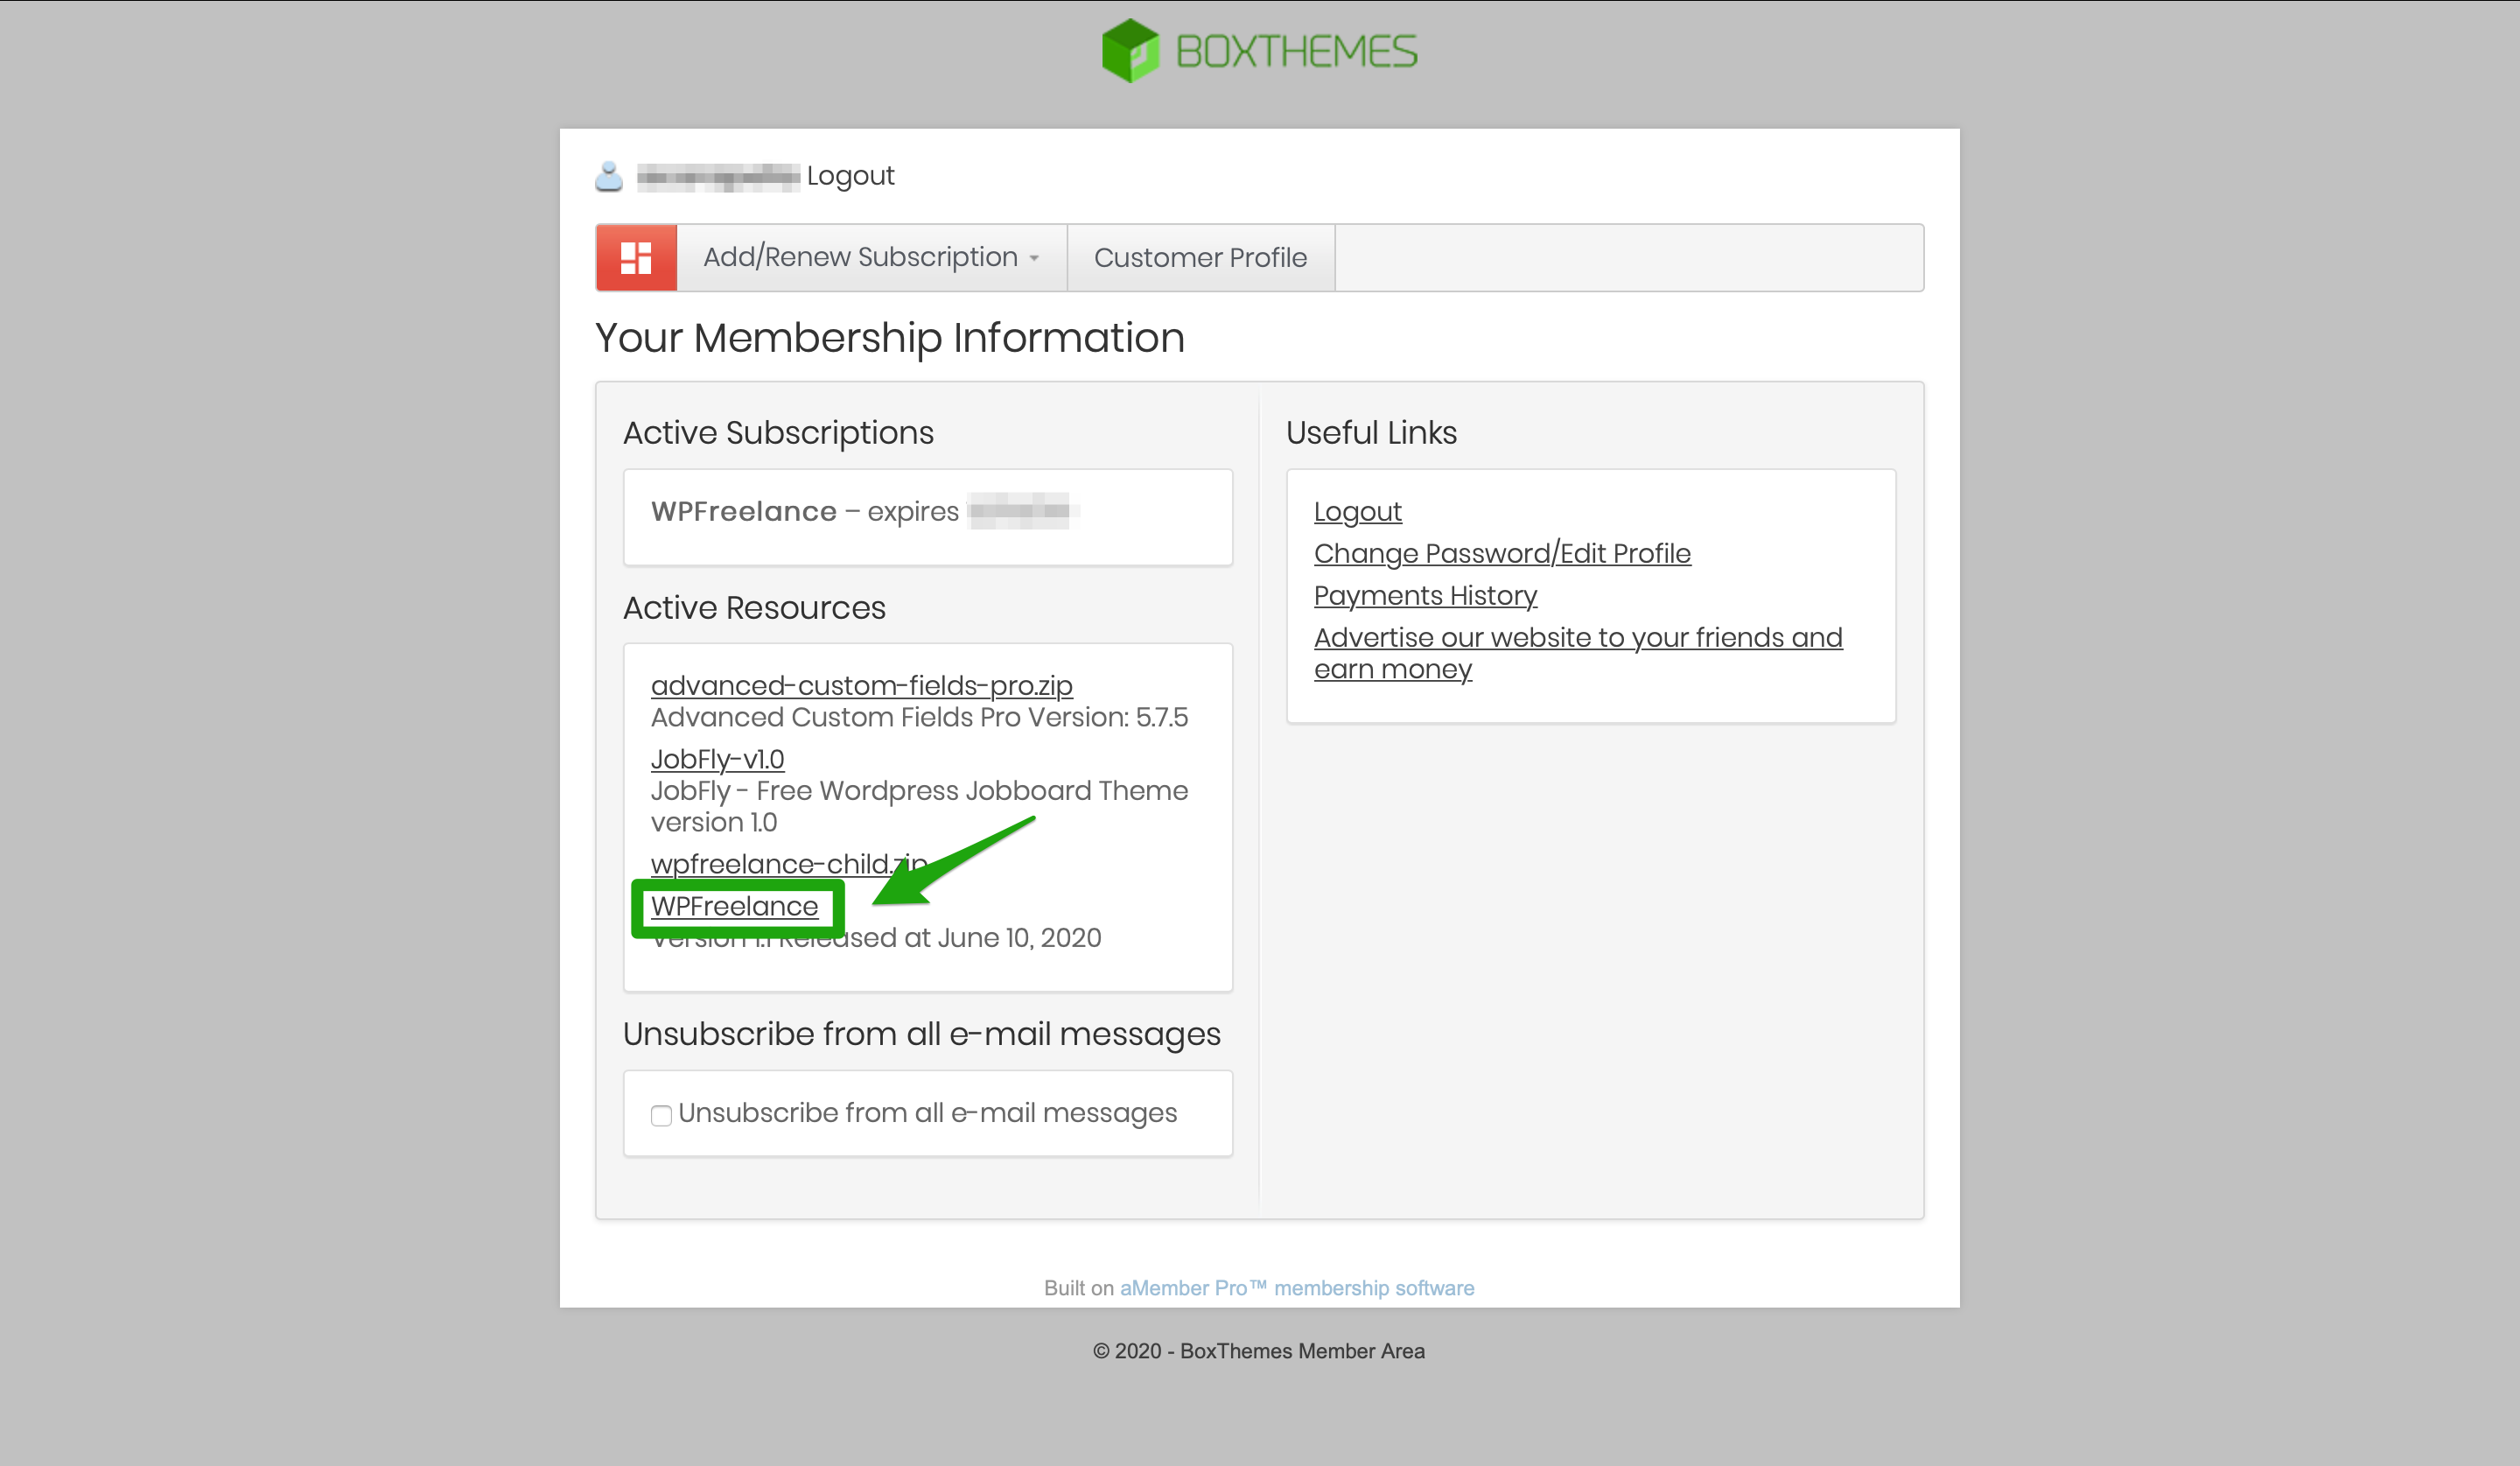
- Go to BoxThemes member area
- Log in to your account
- In the Active Resources section, click on the WPFreelance Theme to download the file to your desktop
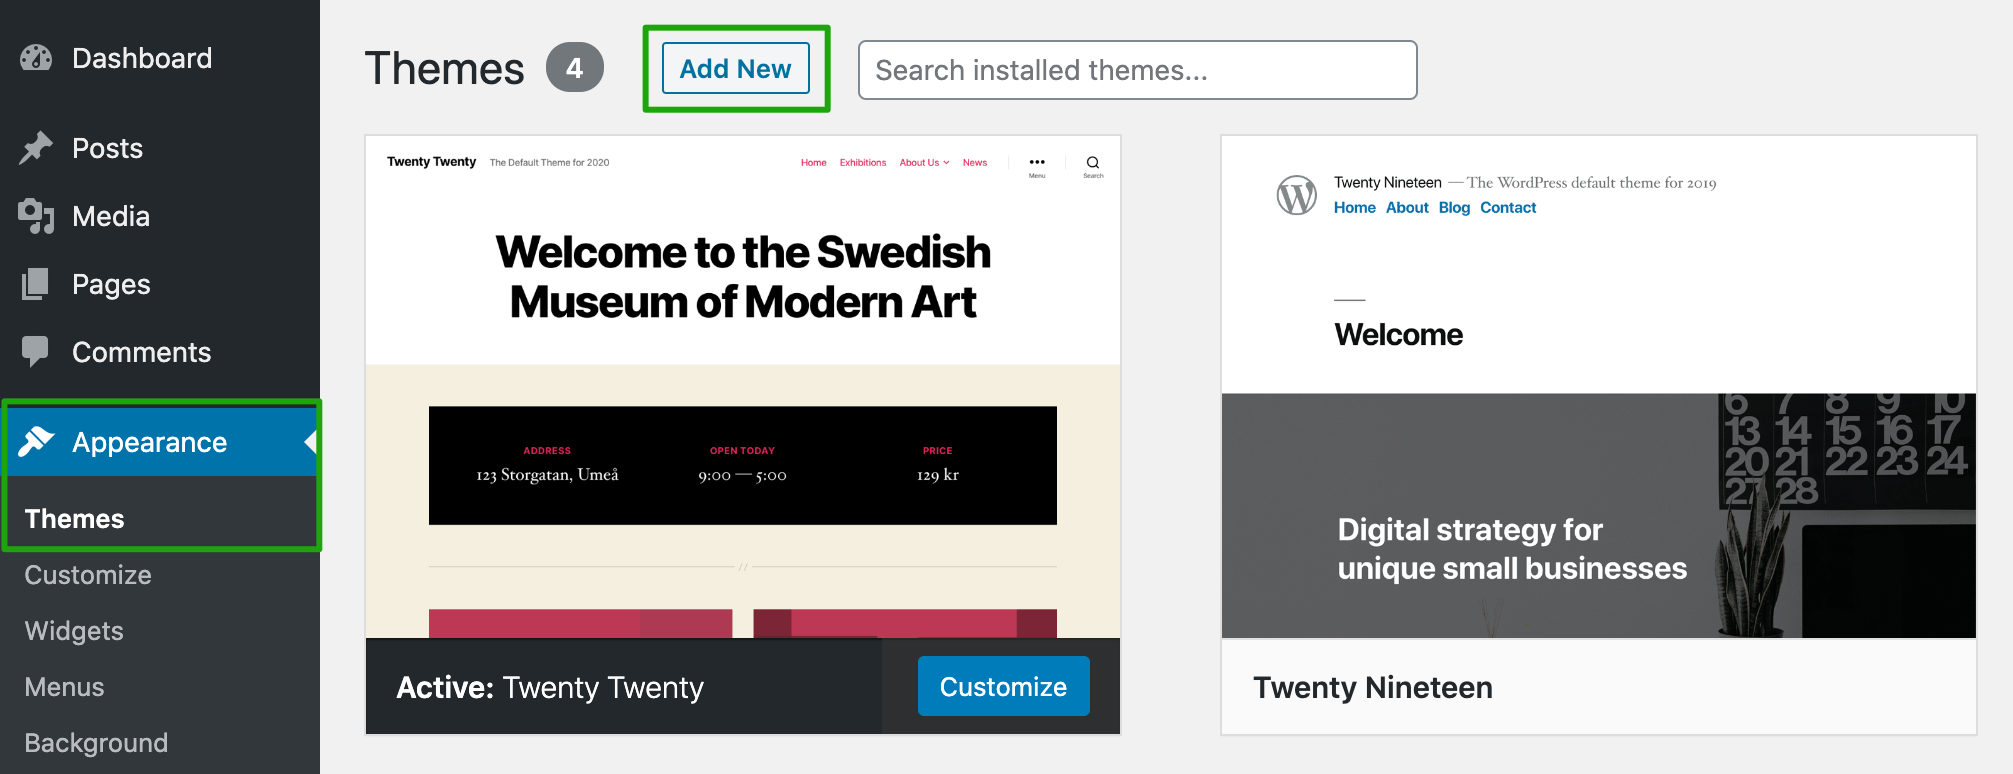
- Log in to your WordPress site dashboard, go to Appearance > Themes and click on Add New button
- On the next screen, click on Upload Theme button. Select the WPFreelance Theme zip file and click Install Now

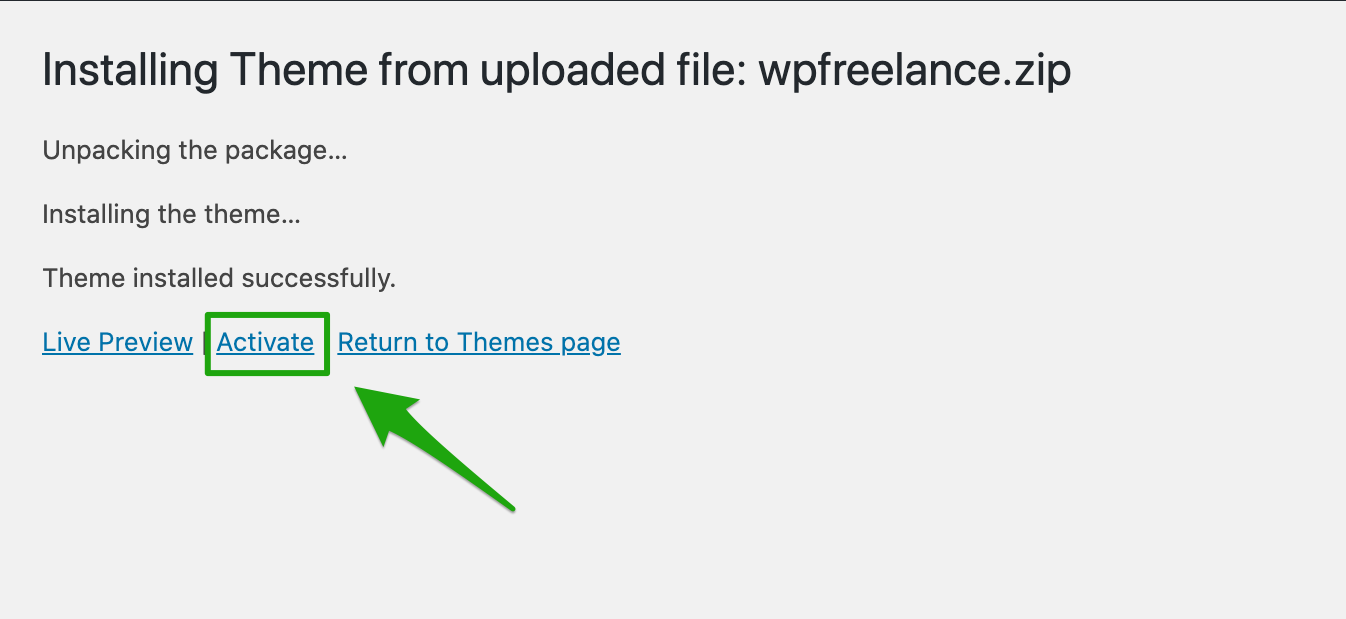
- Upon successful installation, you would get a message “Theme installed successfully”. Click on Activate to to activate your theme. Or else, you could activate it later by accessing Appearance > Themes
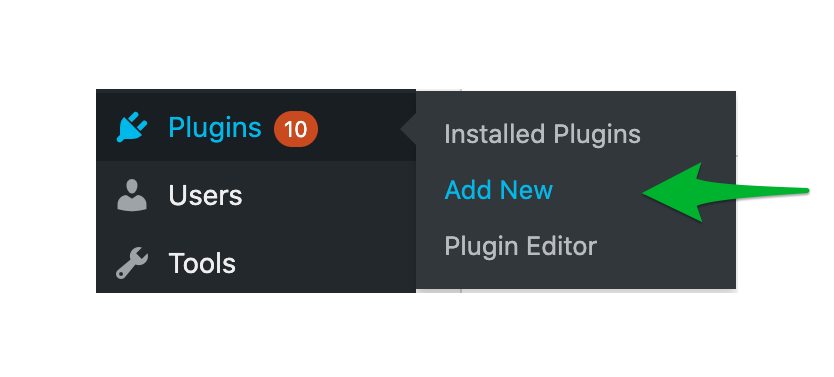
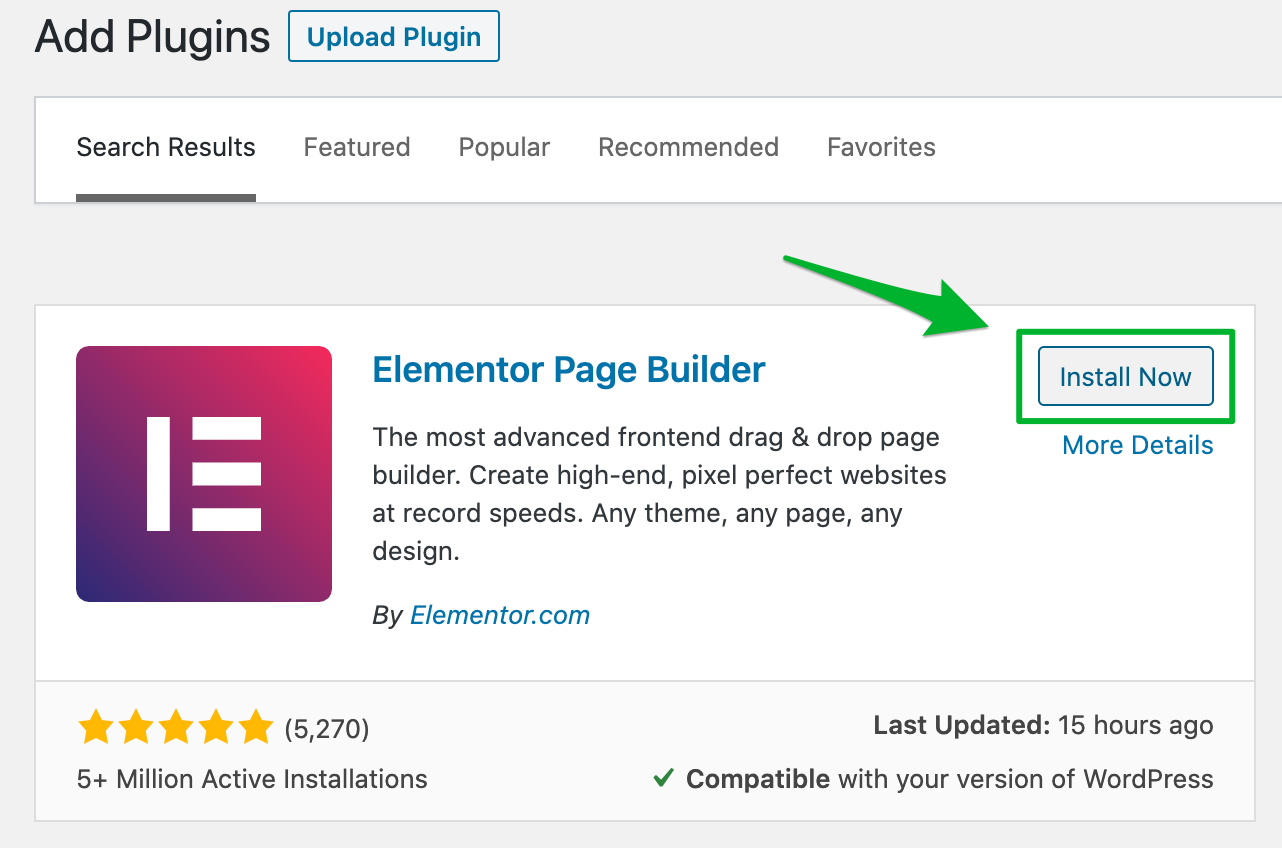
- In addition, in order for WPFreelance Theme to run seamlessly, you’ll need to add Elementor Plugin to your site. To do this, navigate to Plugins > Add new
Type “elementor” in the search box, choose Install for the Elementor Page Builder, than click on Activate.
Leave A Comment?